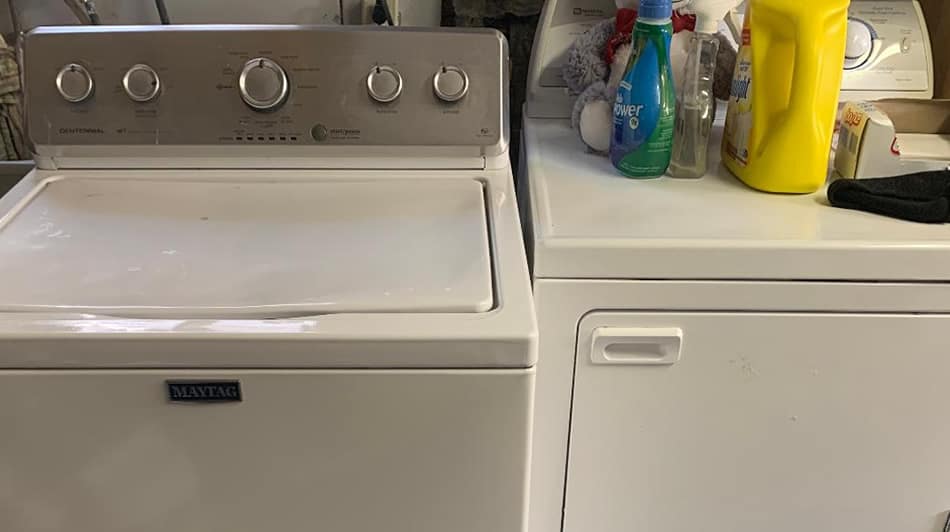
A violently moving washing machine is not only a noisy problem but a dangerous one as well, to you and anything around it.
The most common reason why your washing machine would start moving or jump around is that one or more of the levelling legs which are located on the bottom of the appliance is not properly adjusted and sitting flat on the ground. One other possibility is that your laundry load is imbalanced, causing the washing machine to shake back and forth during a spin cycle.
Over the years, our homes naturally settle and shift slightly into the ground causing the walls and floors to slant. When this happens, it could cause your once levelled washing machine to become gradually unleveled over time.
Placing a washing machine on an uneven floor can cause the appliance to vibrate and move from its resting place. If you have no choice but to have to place your washing machine on an uneven floor, you could try putting a 5/8-inch thick sheet of plywood, levelled with rubber underneath it until you have a solid flat surface to put the washing machine and dryer.

Why Does My Washing Machine Shake So Violently and How Do I fix It?
As mentioned earlier, the most likely reason your washing machine is shaking around so violently is that one or more of the levelling legs at the bottom of the appliance have shifted or were never correctly levelled upon installation.
Try leaning against the washing machine or pushing down on opposite corners to do a quick levelling check. If one of the levelling legs is not sitting flush to the ground, you should be able to wobble or move the washing machine back and forth using this easy technique.
If your washing machine does wobble from side to side, by merely repositioning and tightening the levelling legs should be all it takes to correct the problem.
If you cannot move the washing machine from side to side while pushing down on the opposite corners, the problem could be within the way you loaded in the laundry. Loading too much laundry to one side of the drum would cause an imbalance of too much weight on one side that could throw your washing machine into a violent frenzy during a spin cycle.
Open the lid to the washing machine and spread out the laundry equally. If you are washing a heavy blanket or a bunch of sheets to help distribute the weight evenly, you could also throw in a few towels or extra shirts before you begin.
How Do You Correctly Level a Washing Machine?
Ensuring that your washing machine is correctly levelled, with all four legs touching the floor, is an essential step to ensure that the appliance stays in one place and does not rock back and forth.
Leveling a washing machine is easy to do and only requires a few minutes of your time. Before you begin, make sure that the appliance is empty and sitting in its final resting location.
Tools needed: Bubble level and an adjustable wrench
- Step 1 – Check if the appliance is sitting level:
The best tool for this job is a bubble level. Start first by placing the level on either side of the washing machine, and then on the front and back. If the bubble does not stay in the center of the lines, you know that your washing machine is not level.

- Step 2 – Loosen the lock nuts:
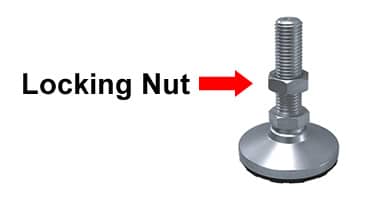
On the bottom front of the washing machine, you will see two legs, each with a lock nut at the top of them. Start first by loosening each of those off slightly.

- Step 3 – Adjust the leg heights:
Ideally, you want the washing machine to sit closer to the ground to help prevent vibration. Start by spinning each of the front legs clockwise so that they get shorter and go up inside the washing machine. You could have someone tip the washing machine back for you while you adjust the leg heights, or you could use a block of wood (a 2 X 4 works great for this) and a crowbar, to slowly and carefully lift the front of the washing machine.
- Step 4 – Check the back legs:
Most washing machines these days have self-leveling legs in the rear that adjust themselves according to the floor. To check if the legs on your washer are self-leveling, you could have someone lift the back end of the appliance off the ground an inch and then watch the legs to see if they level themselves when the machine is lowered back down to the floor. If the washing machine does not have self-leveling legs in the rear, you will have to adjust them in the same way you did the front.
- Step 5 – Level the machine:
Now, with the washing machine on the ground, turn each leg counter-clockwise until they feel as if they are wedged tightly to the floor. Check for movement by slightly pushing down on opposite corners of the washing machine and adjusting each leg as needed until you cannot move the appliance. Double-check with your level to make sure the washer is now sitting level.

- Step 6 – Re-tighter the lock nuts:
Once the washing machine is level and you are satisfied with the adjustments, you can now tighten the lock nuts against the appliance to prevent the legs from vibrating themselves lose.
How To Stop Washer and Dryer Vibration
If your washing machine or dryer is located on one of the home’s upper levels, you might be experiencing some extra vibrations through the floors on laundry day.
To help reduce this extra vibration, you could install anti-vibration pads under each leg of your washing machine and dryer. These pads help absorb the vibration and quiet the noise you are be experiencing.
Anti-vibration pads range in styles and prices. Amazon has a great selection to choose from, or you could also find them at your local hardware store. Click here to see what is currently available on Amazon.
The anti-vibration pads that I use cost me nearly $35 from Amazon, and I think they are doing a great job. Check the current price here. I have my washing machine sitting on a concrete floor in the basement.

Other Possible Reasons Why Your Washing Machine Might Still Be Moving Around
If you have gone through the process of levelling your washing machine and you’ve checked that a load of laundry is balanced out equally inside the washer, then try taking a look at these other possible reasons to rule them out.
- Shock Absorbers: All front-load washing machines have a shock absorber to help control and cushion the tub’s movement during the spin cycle. Over time the shock absorbers could become damaged or cease to work correctly. If that happens, the washer will shake and often make loud banging noises during a spin cycle.
Shock absorbers should last at least 5 – 7 years based on a family of four. Now, of course, this does depend on how frequently you use your washing machine.
Some washers have a suspension spring attached to the tub, which will also help absorb the washer tub’s movement during operation. Sometimes these springs could break or come off, which will result in extra noise.
By taking the front panel off your washing machine while it’s unplugged, you will be able to see what type of shock absorber you have at the bottom of the washer tub.
- Bad Drum Bearings: Bad drum bearings can cause loud, rumbling noise while the drum is spinning. A quick way to check this yourself is by first making sure the washer is turned off and empty. Next, try rotating the drum by hand and listen closely. If you hear a rattling or grinding type noise, the drum bearings might need replacing.
Another way to check to see if the bearings are no good is by spinning both the inner drum and the outer drum to compare the movement between the two. Only an expert should attempt to fix this problem because you could cause major damage to your washer and void your factory warranty if done incorrectly.
- Load Washer Correctly: This sounds like an obvious one, but I should mention it again because you would be surprised at how often a washer is loaded incorrectly, resulting in a violent spin cycle. Evenly distributing your load of laundry in the tub is key to making sure that your washing machine stays firmly in one place and does not cause extra wear and tear on your appliance.
- Washer Motor: The washer motor itself could become noisy if the bearings inside begin to wear out. To test if this is the problem, you could remove the belt and coupler from the washer drum and then run the motor to check if the motor is the source of the hearing’s noise.
- Drain Pump: If you notice that the noise is happening during the drain cycle, the problem could be within the drain pump. Often the drain pump could become clogged with debris or damaged. If the pump is not blocked but continues to make noise, you should replace it with a new one.
